Wednesday, December 7, 2011

November 2011 - Harvest Tally (stolen food, baking too many too yummy cookies and gestational diabetes)

Fall reflections
This marks the tenth month of our mini-farm adventure and fall is HERE.

What's new? Let's start with the sad sad sad news.... my hive is dead. After taking it apart and asking many experienced beekeepers, it turned out to have been mites, followed by honey robbery from another colony. It was pretty devastating. Apparently, in California, mites come fast and furious, which is why, mite prevention has to start in September and then again in February. Well, I started in October. 

BUT we got loads of beeswax, so I will make many candles, salves etc. Of course only after we build (or buy) a beeswax melter.
On the more positive side, all four of our birds are still laying, despite the harsh temperatures. Today in the morning it was 26 degrees Fahrenheit. Brrrrrrr.

What else? Roberto has built an awesome wrought iron tile-mosaic table, which I love! And I have been knitting, crocheting and sewing for Aurelia, me and baby #2 like a mad person. This babe will be the most uniquely dressed wee-one around; including cloth diapers. I am planning on posting a few baby and maternity tutorials shortly, so stay tuned. 
Baking cookies, but first hands washing

And yes, Aurelia and I baked cookies. . . of course, I ate so many of them right before I had my pregnancy glucose test that now my health care team is convinced that I am at risk for gestational diabetes. No, it's only the holiday season and I baked (and ate) many yummy cookies.

So, I was reviewing my diet with #2 versus the Aurelia pregnancy, from what I recall (mami-nesia, HELLO!). I honestly don't think that I changed anything, mainly because I do not EVAH watch what I eat anyways and simply eat what I like. . . And what I like has not changed. So, the only thing different is that I am not working as a personal trainer anymore, when you are basically active with your clients all day long. Yes, I have turned into a couch-potatoe-cookie-monster. Oh my.

Anywho, you will see Schoko and me now walking and hiking more.

So, on the more interesting subjects: After sowing loads of winter crops, my chickens crossed my plans and scratched up all the seeds. Well, at least someone on the homestead got a meal out of my workings.

So, just like October, November 2011 was not such a great month for us harvesting-wise, either.

Speaking of stolen food... Our labrador girlie has developped a new trait: She gets on her hindlegs and sneaks whatever food is left on the dining room table. And I mean whatever is left on the plates. So far she has not broken any of my good plates but Roberto and Aurelia are determined to catch her doing her dirty deed.

On the growing side: The peas are looking great, growing like crazy (I planted them in the frontyard, where my hungry chickens cannot get to) and I have noticed already some garlic sprouts. So, I am hopeful that we will be harvesting again some time soon. . .

Anywho, without further ado, here is the harvest tally for November 2011:

3 lbs Tomatoes
5 lbs Zucchini
1 lbs Eggplant
1 Persimmon (it's a baby-tree)

A total of 9 lbs of produce and 58 duck and 44 chicken eggs. 

"Nature never says one thing and wisdom another." Decimus Junius Juvenalis

Friday, November 4, 2011

October 2011 - Harvest Tally (Green Eggs and no Ham)

This marks the nineth month of our mini-farm adventure and fall truely has arrived with temps in the low 40's here on the Suburban Homestead in Southern California. Roberto has been starting to research * again * for a fireplace insert to heat the home in a more sustainable way and I am hoping for an insert that can be used to bake bread in or at least heat water on top. Woolen gear (hats, sweaters, mittens and socks) is all the rave in our house right now and I have been knitting and crocheting endless hours to make sure everyone is warm.

With the summer crops rotating out and the new crops not yet in place (note to myself: planning for bumper crops for next spring and fall!), October 2011 was not such a great month for us harvesting-wise.

The chickens are well over half a year old but had not started laying and considering the temps, I started to write off that any of our Easter Eggers will lay an egg before next spring, after molt. But then on the last day of October, guess what they did: THEY EACH LAID AN EGG.

Now, the name Easter Eggers was not given to this breed in vain; they do lay eggs in blue, green and pink. However, the color of the eggs won't change. Once a hen lays blue (or green or pink) eggs, she will do so for as long as she lays. Well, I am proud to announce, that we are having GREEN EGGS ... and no ham.

My bees filled up their three supers perfectly but I decided - since this is our first year - to let them have it all and see what is left to be harvested in spring, if any.

We still have a bunch of green tomatoes on the vines, which I am sure won't all come to red and juicy maturity, so I am already searching for green tomato recipes. Probably within the next few days, I will harvest them all. Green or not. Let the window sill do its juicy.

However, October was a super busy month for us: I have been preparing some of the beds for the next season by pulling the old and dead plants out, placing old cardboard over the beds, emptying one of our compost piles and loading the goods onto those beds and then covering the beds with bark. I also rotated some of our perennials around to group them more according to their watering needs to ensure I do not kill someone by over- or underwatering their neighboring plant. Since I can only do this during dormancy state of each plant (which varies), I will keep doing this until next spring or even summer and this way slowly re-design the landscape somewhat.

We seeded a bunch of winter crops: salads, cabbages, beets, peas, carrots, garlic, brussel sprouts and brokkoli. Sadly, though, I had to notice that one day after planting about one hundred beet seedlings, there were no seedlings left; the bunnies must have gotten them all. Yes, all of them.

On the more happy side: The peas are looking great and I have noticed already some garlic sprouts. So, I am hopeful that we will be harvesting again some time soon. . .

There are still some zucchinis on my plants. However, since the temps are so low, I am planning on pulling these babies within the next days as well. They supplied us with wonderful produce all throughout summer.

As far as work on the house goes: We have been searching everywhere for another wall fountain for the backyard and a wrought iron mosaic table with chairs but were either disappointed by the price or the look of what we found. Inspired by some pictures from Parc Guell in Barcelona, designed by Antoni Gaudi, we have decided to design and build these items ourselves. Yes, like we do not have enough work yet. Stay tuned... it may get interesting.

Anywho, without further ado, here is the harvest tally for October 2011:

5 lbs Tomatoes
5 lbs Zucchini
4 lbs Eggplant
2 lbs Pomegranate
2 lbs Savoy cabbage
couple handful of Hibiscus flowers (which are dry by now and will be great in a tea ... ahh, cannot wait!)

A total of 18 lbs of produce and 56 duck and 2 chicken eggs. 

"Nature never says one thing and wisdom another." Decimus Junius Juvenalis

Saturday, October 29, 2011

Homemade Fall Remedies - Vick Vaporub for Bees and Children

I love homemade remedies. This goes for my family and our animals, who - let's be honest - are part of the family anyways. Today I learnt something interesting: What's good enough to treat a human cold, may actually also help bees to overwinter more easily.

Over the last few days, I have been reading up on how to prepare my hive for the winter. I know, many of you will laugh and claim that it does not get too cold here in Southern California. However, this week alone we have had many mornings when it was 43F degrees at around 7am and  personally, I considered it cold.

This made me wonder about all our animals. While Schoko sleeps in my bed (ahh, thank god for her higher body temperature!) and the birds have down feathers and loads of saw dust to keep them cozy, my bees are pretty much exposed, I felt. So I started researching.

Apparently, the most important thing for a hive in winter is ventilation. Well, we have a bottom and a top opening, which the girlies use, so they should bee happy. Another issue that kept coming up is that pests may get to them, in particular mites.   In a backyard beekeeping book, I found a recommendation to strenghten the colony and prevent the worst when it comes to pests through use of essential oils. The recipe is a variation of Api Life, a pest management medication that is considered organic.

Here is the recipe that I used for my bees:

Cut an all natural sponge in tiny pieces and soak them in a mix of essential oils:

35 drops thyme
20 drops eucalyptus
10 drops peppermint
10 drops camphor

Then place these sponge pieces on top of the frames. Leave them in for about one week and replace them with the same. It was recommended to do this three times.

So, and here is the funny part... My little pumpkin has been complaining about a stuffy nose and having a heard time breathing. Roberto and my first thought was 'vick vaporub' to make breathing more easy and help with the common cold's aches and pains. Since I was already cooking up medication for my bees, I figured, I read up on the ingredients in that magic potion to see whether I can brew this as well. Turns out: Yep, I can! Interestingly, vick vaporub's ingredients reads pretty much like the mixture above.

So I whipped up this concoction for my little princess:

1/4 cup of beeswax melted in
1 cup of olive oil

Add these essential oils:

30 drops eucalyptus
20 drops peppermint
10 drops of camphor

Let it cool off and rub away those cold aches and pains.

"Nature never says one thing and wisdom another." Decimus Junius Juvenalis

Wednesday, October 26, 2011

MAMIS MITTENS - CROCHET TUTORIAL

My friend Stefanie asked for directions to make my mittens. Which I promised to write down in exchange for spekulatius. For those of you who have never had spekulatius, I am sorry, YOU HAVE NOT LIVED until you try those christmas cookies from Germany. I LOVE them and there is no way getting them in Southern California.

Unfortunately, I had crochet these mittens a while ago  without a pattern and used simply my own little two hands as measurement.

So, with this tremendously strong lure of spekulatius, I went to work and counted loops and rows of my mittens. . .  I hope this pattern is correct. In case you try re-creating these and you run into problems, let me know. I am pretty confident, we can figure it out ;-).

My mittens were made from pretty thick yarn; I would guess with a 8mm hook and the mittens measure  about 15 inches from top to bottom or 38cm. The circumference at the opening is 29cm or 11.5 inches.

These mittens are looong and when I wear them, they almost reach up to my elbow. If you don't want yours that long, take this in consideration when crocheting.

In case you need some help with the stitches, check out lion brands crochet tutorial videos.

http://learntocrochet.lionbrand.com/

These mittens are double-crocheted. If you chose to single-crochet them, the conversion from double to single crochet is about 1:1.5.

Without further speculation, here is how I crochet my mittens:

Cast on 34 loops and close to circle. Check whether this fits around your arm at the place where you want the mitten to reach up to. Adjust if necessary.

Cast 3. Double-crochet one per each loop. Close to circle with chain stitch.

Start reducing loops: Cast 3, double-crochet 30. To reduce, skip two loops that are opposite each other.

Cast 3. Double-crochet 28. Close to circle with chain stitch.

Cast 3. Double-crochet 26. Close to circle with chain stitch.

Cast 3. Double-crochet 24. Close to circle with chain stitch.

Cast 3. Double-crochet 22. Close to circle with chain stitch.

Cast 3. Double-crochet 22. Close to circle with chain stitch.

Cast 3. Double-crochet 22.  Close to circle with chain stitch.  These is the tight spot. It should fit your wrist. Try it on and adjust if necessary.

Cast 3. Double-crochet 24. Close to circle with chain stitch.  Add the two loops at the same place where you reduce before.

Try the 'mitten' on. This should cover and fit your wrist up to the point where your thumb starts.

This is tricky now, because we have to part with the thumb and finish the main hand part of the mitten first. So, from here on, crochet in rows.

Double-crochet 22, turn.

Cast 3, double-crochet 22, turn.

Try it on again. You should have passed by your thumb and can continue to crochet in circles again. If not, add another row.

 Chain one. Double-crochet 21.

 Double-crochet 22. Close to circle with chain stitch.

 Double-crochet 22. Close to circle with chain stitch.

 Double-crochet 20. Close to circle with chain stitch.

 Double-crochet 18. Close to circle with chain stitch.

Skip every other and double-crochet 9, chain one.

Cast these 10 all off together.

Now about the thumb:

At the point where we left off, single-crochet around the whole with 14, chain one.

Cast 3, double-crochet 12, chain one; yes, we start reducing again.

Cast 3, double-crochet 9, chain one.

Cast 3, double-crochet and skip every other loop, chain at end.

Cast all off together.

Make mitten #2 and embellish as you like.

I cut hearts and flowers out of felt and stitched them on and single-crochet a border on the opening.


"Nature never says one thing and wisdom another." Decimus Junius Juvenalis

Ad-OWL-rable HAT for the wee-ones - CROCHET HAT TUTORIAL

Inspired by a picture my friend Stefanie has sent me (THANKS AGAIN!), I dropped EVERYTHING to re-create this as-wol-rable hat with leftover yarns I found around the house. I ended up using from Nation's Washable EWE made in Australia; it is part of the Coats and Clark Company.

It is 100% superwash wool without the scratch-factor; ideal for kids since it won't scratch, which makes baby happy but it will keep lil heads nice and toasty. The label reads you can machine wash it on old, gentle cycle: So, mom likes this yarn, too.

I really think they should send a bunch of yarn balls my way ;-).

As I said, I used leftovers, so you may only need one third or at max half of a ball of yarn. This particular yarn comes in 100g balls. I would guess that you need less than 40g of each color: purple, green and less than 20g of yellow and white. Aah yes, and I used a 4mm crochet hook.

The circumference of this finished hat is approx. 19 inches or 48cm.

Anyhoohooot, here is how I did it: 

With purple yarn, I cast on 5 loops and close to a circle; you should have 6 loops now.

In each of these 6 loops, double-crochet 2.

In each of these 12, double-crochet 2.

Now, *double-crochet one, double-crochet two per loop*. Repeat between *. Now, you should have 36 loops.

Next, *double-crochet one, double-crochet one, double-crochet one, double-crochet two per loop*. Repeat between *. Now, you should have 48 loops.

Then, *double-crochet one, double-crochet one, double-crochet one, double-crochet one, double-crochet one, double-crochet two per loop*. Repeat between *. Now, you should have 64 loops.

Change to green color and double-crochet each loop for the next three rows.

In the next row, reduce loops to 60.

Double-crochet another row with 60 loops.

Next, to make the ears, single-crochet 30 loops, turn the whole project around, single-crochet back 5 loops, turn again.

Cast one, single-crochet 3, turn.

Chain one, single-crochet two, turn.

This is ear #1. Single-crochet down the ear to get back to the main line of the hat, single-crochet 30 and make the second ear. Cast off. 

To make the eyes, I used purple yarn, cast on 4 loops and closed them to a circle. The eyes are single-crochet in circles. 

Next, in each loop, of previous row, single-crochet two in purple. Switch color to white. 

Then, in each loop, of previous row, single-crochet two in white. 

After that, in each loop, of previous row, single-crochet two in white. Cast off.

Repeat for eye #2 and stitch them on hat.

For the beak, I used yellow yarn, cast on one and single-crochet in rows. In first row, single-crochet 3 in first row's loop. Turn.

Cast one, 4 single-crochet. Turn.

Cast one, 6 single-crochet. Turn.

Cast one, 6 single-crochet. Turn.

Cast one, 6 single-crochet. Cast off. Stitch to hat.

For the pom-ears, I used several threads of about 3 inches length (8cm) of purple, yellow and green and knotted them on top of the owl's head.

To make the braids, I used the same technic as for the ear-poms, however the thread was much longer and connected them to the ears and braided them. 

So, now the owl in our backyard has some SERIOUS competition. . . 

"Nature never says one thing and wisdom another." Decimus Junius Juvenalis

Thursday, October 13, 2011

TUTORIAL: Crocheting Baby Bibs - Bibbe-Dee-Bobbe-Dee Frog and Duck

Here is an easy to make item for a baby-shower: Baby-Bibs

Our beloved mess-master wee-ones seem to always be in need of a bib and mommy-to-be will be happy for yet another bib.

Here is how I made the Froggy:

  • 1 ball green cotton yarn; I used Sugar & Cream
  • 1 ball white cotton yarn; I used Sugar & Cream
  • 1 ball black cotton yarn; I used Sugar & Cream
  • 1 ball brown cotton yarn; I used Sugar & Cream

With a crocheting hook in European size 5 or US 8, I casted 15 loops with the green yarn.
In the following 12 single-crocheted rows, I added one loop per side.
In the last 8 single-crocheted rows, I subtracted one loop per side and finished the bib by single- crocheting around the entire piece, weaving in any threads.

Then I made the first of the eyes with the white yarn by casting 4 loops and single-crocheted 4 rows to it, then casted all four loops off together and used the crocheting hook with the white yarn to stitch the eye onto the green base. Repeat for eye #2.

For the pupils, I made the first one with the black yarn by casting 1 loop and single-crocheted 5 casts out of it, and then used the crocheting hook with the black yarn to stitch the eye onto the green base. Repeat for eye #2.

The mouth is simply 15 loops with one single-crochet row on top (using the brown yarn) and stitched onto the green base.

DONE!


And here are the directions for Ducky:

  • 1 ball yellow cotton yarn; I used Sugar & Cream
  • 1 ball white cotton yarn; I used Sugar & Cream
  • 1 ball black cotton yarn; I used Sugar & Cream
  • 1 ball brown cotton yarn; I used Sugar & Cream


With a crocheting hook in European size 5 or US 8, I casted 20 loops with the yellow yarn. 
In the following 10 single-crocheted rows, I added one loop per side.
In the last 10 single-crocheted rows, I subtracted one loop per side and finished the bib by single- crocheting around the entire piece, weaving in any threads.

Then I made the first of the eyes with the white yarn by casting 6 loops and single-crocheted 5 rows to it, then reduced the loops one per side until only one loop left and used the crocheting hook with the white yarn to stitch the eye onto the green base. Repeat for eye #2. 

For the pupils, I made the first one with the black yarn by casting 1 loop and single-crocheted 5 casts out of it, and then used the crocheting hook with the black yarn to stitch the eye onto the green base. Repeat for eye #2. 

The mouth is made like this: 12 loops with 7 single-crochet rows on top (using the brown yarn), adding one loop per side and stitched onto the yellow base.

DONE!


"Nature never says one thing and wisdom another." Decimus Junius Juvenalis

Saturday, October 8, 2011

CABBAGES - A WINTER CROP

Here is one of my dummy first year homesteader mistakes:

With a German planting schedule in my head, I planted cabbages, beets and salads in spring. However, in Southern California with its high temps, this is rather harsh on these poor plants.

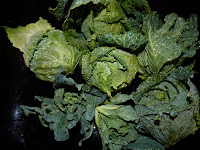
I harvested some but definetely not the amount that I planted and the plants as such were soo small. These 7 heads barely make the 4 lbs mark.

Now however, is great planting time for these guys and guess what is sprouting in my kitchen right now...


"Nature never says one thing and wisdom another." Decimus Junius Juvenalis
Natural Remedies for the Cold Season

We are not too keen on bringing out the big guns, say antibios or even fever reducers, to treat a cold unless absolutely necessary. In light of the fact that several children's cold remedies and fever reducers have been pulled off market here in the US or are no longer available over the counter, moms have asked me for natural remedies for colds. Personally, I have to admit, that we are all blessed with great health. However, there were few times, when one of us caught a bug and with the cold season upon us, I wanted to share a couple of home and herbal remedies, that we use.


For children who are still nursing, keep doing it! This is the best thing you can do to keep your babe hydrated and strengthen her / his immunity and more likely than not, this may be the only thing your babe wants and / or will take anyway.


For weaned children and adults, avoid dairy, since I found it creates more mucus. Then feed loads of fresh fruit and warm drinks of lemon water with honey or try sage tea with honey; be careful not to use honey with infants.

Some people swear by eating raw garlic and onions for their antiseptic benefits. However, I am doubtful that any child will be willing to eat any of them raw, even when in perfect health. But, hey, worth a try!

Obviously hot baths with infusions are benefitial; try pine needles or rosemary, dried or fresh.

Coughs are a bit tricky. I found the worst is the scratchy in the throat, which is only soothed by drinking loads of ideally warm liquids. Great are syrups from berries (black currants) with honey as well as sage tea with honey.

For congested noses, I like to use saltwater douches. I know, this is kind of gross but it truely helps to get the mucus out and dry up the area. Use 1 teaspoon of seasalt for 2 cups of water. Be careful not to use too much salt.

To bring down temperatures, we soak towels in coldwater and wrap them around the calves. It doesn't feel too good but it works to bring down the temperature.

As with everything that we put into our bodies, I believe it is even more important during sick times: Please use organic produce to ensure best results and avoid that your body has to deal with additional intruders.

Generally, I do not like using medication to drive fever down unless the fever is really high. I believe, our bodies have great heeling powers and typically - if left alone - our bodies are equipped to deal with a cold and even most flus just fine.

In contrast, if you allow your body to heel itself, it is likely to generate more immunity and you may not become sick as often anymore. I believe, we all know some of those people, who have the flu and the cold all the time and keep taking loads of meds.

As the doctor in our house always likes to point out, "The hardest thing to do is simply NOTHING!"

Personally, I did not find that any cold meds could cure any of the colds I have ever had faster and agree with my mom, who used to say, "A cold lasts two weeks with meds and ten days without." 

How to get meds into kids?

However, if the temperature goes too high in your little one, please use the fever reducers. And yes, they are not too crazy about taking this yucky stuff and you may need to resort to these tricks: 

For very little ones: With the appropriate amount (read directions or ask a doctor) meds in a syringe, pour them into the little mouth and then immediately blow air into their face. This will make them swollow the stuff instead of spitting it out again. 

For young children, I use orange juice (or any other juice that your child likes) with the appropriate amount of meds (read directions or ask a doctor) mixed together and chilled into a popsicle. 

And most importantly: Do not send them to school! I know, we all want our kids to learn how to share but a cold is not one of the things that should be shared; no, seriously! The other moms (and the teachers!) will be eternally grateful!


"Nature never says one thing and wisdom another." Decimus Junius Juvenalis

September 2011 Harvest Tally

This marks the eighth month of our homesteading adventure and sadly, the summer is officially over.

Cold Fall has arrived
The temperatures have dropped noticeably and we are already bringing out our fall clothes again, which in Aurelia's case means we have to buy new ones or I have to see what I can sow up. She loves dresses and dresses only. A skirt and shirt combo won't do. I have found already a cute pattern and now have to see what my comprehensive fabric collection has to offer. 


Seeding Winter Crops
As for the garden, I am already seeding to seed for the fall and winter harvest: salads, cabbages (yesss, I will try again these pest-ridden brussels and red cabbages as well as kohlrabi), beets, carrots and other cold weather crops. 

September 2011 was not such a great month for us, though. Here is the harvest overview:

8 lbs Tomatoes
39 lbs Zucchini
3 lbs Eggplant

A total of 50 lbs of produce and 58 duck eggs. 

Duck Eggs in Baked Goods
Since it was Roberto's birthday, I got to use some of our duck eggs for his birthday-cake: German Chocolate Cake. I had made it before with regular store-bought chicken eggs and was told that this cake noticeably tasted better. When asked, what I had done differently, I initially responded, "Nothing!" It was only later that I realized: Yes, the duck eggs. If you have never used or tasted duck eggs in baked goods, it is about time that you give this a try: The duck eggs make baked goods extra fluffy and yummy. You already notice it when mixing the batter: These eggs are so much richer. 

Green Tomatoes
We still have a bunch of green tomatoes on the vines, which I am sure wont all come to red maturity, so I am already searching for green tomato recipes. You know any? Send them my way! THX!

What typically is done with green tomatoes: You pick them and store them on the window sill. They will turn red but will not taste as good as those vine ripened ones. They are more comparable to those immaturely picked store bought tomatoes, that we are trying to avoid. 


"Nature never says one thing and wisdom another." Decimus Junius Juvenalis

Sunday, October 2, 2011

ETROG - Buddhahand Lemon

If you have never seen these fruits, they are quite something: A lemon that has several 'fingers'.

A bit over two years ago, when Roberto and I were looking at a 13 acre farm, when we saw an etrog tree. Ungrafted. Needless to say, that I took a few cuttings. Unfortunately only one sprouted.

Etrog - per Jewish law - is only to be considered kosher if indeed it was grown from seed or taken from a cutting from an ungrafted tree.

The laws are very particular about the fact that you cannot use fruit from a grafted tree for Soccot (The Fest of the Tabernacles).

Now, our etrog has been sitting in a container for quite a while and grown into somewhat of a bush. I am planning to transplant this baby into its final destination in the frontyard next spring (May or June), which is supposedly the best time to transplant citrus.

Then after the final transplant, for the next 3 years, no fruit can be harvested from the tree for it to be considered kosher. In case you keep re-potting your etrog, the 3 year wait starts after each transplanting new.

Some people claim you have to have a rabbi bless your tree while other growers claim it is not neccessary for the tree to be kosher. I decided, it cannot harm and am going to look for someone to bless my citrus-baby next spring.

We are very excited about our etrog tree since they are truely a showstopper or as some growers call them 'a collectible tree'.

BTW: Happy New Year!!!

Want more information? http://www.botanicalgarden.ubc.ca/forums/showthread.php?t=10312

"Nature never says one thing and wisdom another." Decimus Junius Juvenalis

Wednesday, September 28, 2011

TUTORIAL - FALL WREATH

It is fall.

Not that anyone around here in Southern California is planning on bringing out the mittens any time soon, but we can still be somewhat festive.

I like door wreaths and find them an easy and inexpensive way to spruce up the entrance a bit.

Being on a budget, I could not justify going out to buy any decor, so I went through my excessive assortment of fabrics and ribbons to look whether I had some things at home that may make for a nice fall wreath.

Here is what I found:

  • wire remnants
  • dried red corn from our harvest
  • about 2 yards of orange burlap
  • a spool of orange ribbon
  • a little bit of green and white checkered ribbon

Alright, let's get creative.

I twisted the burlap into a long 'snake'.

I had used burlap to make wreaths in the past and found it great for making a basis for a wreath since the material is pretty sturdy.

It comes in a variety of colors and is rather inexpensive, if you end up having to purchase it; around $3 per yard.


To make a wreath out of this burlap 'snake', I wrapped the ends around the body of the snake and then poked the ends into some 'skin' folds. Yeah, it's all nip and tuck here in California ;-).

Now you have a basis that you decorate anyway you want to.

Using wire is great because it adds more structure and you can use it to tie all sorts of decorative items to the wreath.


"Nature never says one thing and wisdom another." Decimus Junius Juvenalis

Monday, September 26, 2011

Growing Garlic - The Stinking Rose

Since my taste buds are heavily influenced by a fusion of Thai, French and my Mama's Cuisine, cooking without garlic is next to impossible for me.

After a bit of research, I found out that you can buy some beautiful heirloom seeds from Underground Gardens or you simple take a bulb from an organic farmer or even grab some organic garlic at your health store and divide up the cloves. For my test run, I decided to go the inexpensive route. Once, I am a bit more familiar with growing garlic, I may give these beautiful heirlooms a try.

Anywho, after dividing them up, I put them into the soil with an about 6 inch spacing, root down, sprinkled some wormi-compost around, watered it and now I am waiting to see what happens.

Apparently fall, mid October is the best time to plant, although some French and even German growers claim, you need to put them in on the shortest day of the year.

Once you see the green shoots, you are supposed to mulch it. They may or may not die back in winter.

In spring, loosen up the mulch to look for shoots and feed them with seaweed. Obviously they need to be weeded.

It takes about 8 months for garlic to be ready to harvest, so it is not a crop for impatient people.

Need more tips on how to grow it?

http://www.thedailygreen.com/green-homes/blogs/organic-gardening/growing-garlic-460709


"Nature never says one thing and wisdom another." Decimus Junius Juvenalis

Sunday, September 25, 2011

Tutorial - Lavender Sachets

Laah!vender Sachets
We have a lot of lavender plants, who were blooming like there was no tomorrow to the benefit of our bees, who I am expecting to have made the most amazing honey.

With lavender plants it is a bit tricky: They can grow super large in no time and in order to keep them from taking over, you need to prune them. Heavily! No, seriously!

This is great, because you can then take the flowers and hang them up to dry. Yes, we had aromatherapy in all rooms.

After drying them for quite a while, it was time to do something with these flowers.

I peeled the buds off and decided to make lavender sachets.


Laah!vender Sachets are GREAT GIFTS:

Most people use these sachets in their linen closet or sock drawer to infuse clothing with good smells and  to fight off moths. In particular in the sock drawer, lavender can also be benefitial with its antiseptic effects.

Lavender has calming effects and some people put a sachet next to their bed and it can even be used in the car for people who tend to get motion sickness.


You will need:

  • muslin 6 x 6 inches
  • thread
  • ribbon
  • couple hand fulls of dried organic lavender buds; the best variety for this purpose is Lavandula Augustofolia


Here is how I did it:


I chose unbleached muslin, because I thought why would I use some bleached material for my all organic English Lavender?!

So, I cut the muslin into 6 x 6 inch squares.

With the pretty side facing down, I folded in the top twice and stitched it.


With the pretty side facing up, I folded it in lengthwise and stitched shut the two open sides, creating a bag. Then I turned the piece inside out and filled it with the lavender buds and tied a ribbon around it.

If you do not have lavender, but still want to make sachets, there are plenty of places to buy dried lavender online by the pound, which sells at around US$15.

Of course, this was the basic version and I ended up adding some heart shaped fabric scraps to it, which you can see here.


You want one? Become a follower of this blog (click button on the right) and eMail me your mailing address to K@GardensofChange.com and I will post one off to you.


"Nature never says one thing and wisdom another." Decimus Junius Juvenalis

Saturday, September 24, 2011

Laah!vender

This has been a lavender busy few days for me. I was cutting off lavender and hung it up to dry. Then I took the already dried bushels off to peel the buds off. What a chore and you end up smelling like a monster-lavender.

The plan is to create lavender sachets with unbleached muslin, which after purchasing I washed and it is now drying up so that I can cut the pieces to start the sewing process; a tutorial is in the making, so stay tuned.

Meanwhile my dining room table looks like a lavender explosion has hit and there are a flock of hungry birds quacking, crowing and clucking.

Thank god for a very forgiving man and dog!

"Nature never says one thing and wisdom another." Decimus Junius Juvenalis

Friday, September 2, 2011

AUGUST 2011 HARVEST TALLY

Aurelia picking tomatoes
This marks our seventh months into our homesteadying adventure and the summer comes to an end.

While we are picking the fruits of our labour, I am already thinkning about the fall and winter months to come, when we won't be enjoying the bounty of our own yard.

August 2011 was a good month for us; the much expected tomatoes and edamame were ripe and were enjoyed.

Here is the overview:

1/2 lbs Artichokes
34 lbs Tomatoes
25 lbs Zucchini
1 lbs Cucumber
Basil (I didn't bother weighing)
1 lbs Edamame (they were sooo good!)

A total of 61.5 lbs of produce!

.... and daily two duck eggs, so a total of 62 duck eggs and sunflowers and lavender!


So, what to do with all these tomatoes, you ask? Well, we gave loads of them away and I made paste, which I froze in glass containers.


"Nature never says one thing and wisdom another." Decimus Junius Juvenalis

Friday, August 19, 2011

WHO DONE IT?

Every time when I take a stroll through our neighborhood, I am observing other people's fruit-laden apple, fig and citrus trees and I wonder whether they all say, "Boy, we have a huge yield this year! I wonder what caused this?"

While I know, who is responsible, I simply am glad that my girls did find so much food and am looking forward to the loads of honey that they must have been producing.

It is pretty simple to help mother nature out and benefit a bit yourself:  So, plant more fruit tree and other edibles and start keeping bees!


"Nature never says one thing and wisdom another." Decimus Junius Juvenalis

Wednesday, August 17, 2011

Passioflora - Passion Fruit - Beauty for one day and common problems

We planted two passion fruit vines with the idea that they will crawl up and around our frontyard arbor and thus creating a neat and eventually edible entrance.

They are located in full sun, so they should have done really well. But they have not. They looked sad, didn't grow and any new vines that grew immediately turned hard without ever even trying to wrap and cling around our arbor. So, Roberto was already making arrangements for their demise.

Until recently. One fine day in July, I noticed new growth.

And then a few weeks later, the very first flower.

Now, if you have never seen a passion flower, it is quite amazing. They are only open for one day and they have special requirements for their pollinator. Typically, only a large bee or better a hummingbird can do the job.

Since our regular Italian bees most likely were not capable of giving this picky plant what it needed, we hope that our many hummingbirds were able to do the trick. Let's see and wait. So far, the flower closed after only one day of beauty and the pedals are still connected but I have not seen any fruit setting yet.


What does the passion flower want?

Well draining soil, full sun, lots of compost (twice a year - one in early spring and one mid summer), frost-free climate (most varieties will grow in USDA 7-10), if possible, plant them in early spring.

Because they are vines, they like to climb up and around some sort of structures.

While it is said, they are fast growers, I cannot say this yet about ours but then again, we have only had them for about 5 months.

While they can be grown from seeds, it may be better to get a rootstock to ensure disease resistance.

They are actually great container plants and not to forget the stunning flower, which start flowering in August.


"Nature never says one thing and wisdom another." Decimus Junius Juvenalis

Eggplant Heaven - My Mama's Ratatouille Recipe

OK, I admit it, I cheated.... I tried to seed eggplants but nothing would sprout. And I told EVERYONE about it. So, I was overjoyed, when my Master Gardener teacher Florence gave me an heirloom eggplant. Of course, a few days later, someone else gave me two other heirloom variety eggplants. Even better!!! With my zucchini and tomatoe abundance, I was planning on eating Ratatouille for months, which is one of my favourite peasant dishes.

We planted these three guys and when the first little purple flowers showed up, we danced around the plants. And then, the fruit started setting in. OMG!

And guess, what happened next? The long forgotten seeds that I had sown on my kitchen seed-starter shelf sprouted. In the end of July, about a dozen new baby eggplants (all heirloom) showed up. Well, I guess, we will truely have Ratatouille for a while...


Here is my MAMA's recipe for Ratatouille (cannot wait!):

In a large crock pot, heat olice oil.

Chop a red onion (white is ok too, but is only real french with a red onion!) and one or two garlic gloves, toss in pot.

Add 4 large tomatoes (cut in half with skin on), 2 medium size zucchinis (little cubes), 1 large eggplant (little cubes), 1 bell pepper (little cubes).

Pepper, Salt, Bay leave.

Simmer for a loong while.

Fetch the tomatoe skins out and serve.


"Nature never says one thing and wisdom another." Decimus Junius Juvenalis

Tomatoed out - How to increase yield

So, I read that tomatoes yield more if you snip the majority of their leaves. That perfectly made sense to me since not soo much energy is lost on making leaves but can directly go into producing juicy tomatoes.

It also helps, to every now and then neglect them (read NO WATER FOR DAYS!) until the remaining leaves look droopy. If you water them then, they will shoot out a gazillion of flowers since the plant thinks it has to prepare for its demise and therefore get the next generation on the road. The result: MORE TOMATOES.

Then just before they are perfectly ripe, you turn the water off again to increase the sugars in the tomatoes. Ahhh, you will be glad you did!

So, I did my part on the large tomatoe harvest and my bees did theirs and here we are with already over 20 lbs of tomatoes harvested and simply no end in sight because they just keep making more.

Seriously, I need to start thinking about canning them, because with an Italian in da house, there is always a need for more tomatoe paste. And I have no canning stuff at home and never done it. That is a recipe for disaster....

My sister also anticipated my drowning with tomatoes and found an old book from our Papa's, in which there was a recipe for KETCHUP. She promised to mail it. Cool, as soon as I get it, I will do that, too!


"Nature never says one thing and wisdom another." Decimus Junius Juvenalis

Wednesday, August 3, 2011

To Grow, Harvest and Cook an Artichoke from Seeds

One of my plants
I planted a few artichoke seeds, despite that everyone told me that they are hard to grow from seed. The general recommendation is to buy a plant or get a divided piece from someone you know. Anywho, we seeded a few. Two seedlings emerged.

So, initially we had two plants. Then I transplanted them close to our sidewalk, resulting in my neighbors dog to mistake these tiny plantlings for a tree. So, I had to transplant them AGAIN and this time my man thought I had killed any hopes for harvesting artichokes. These two guys looked sooo sad: their leaves were wilting and for weeks they looked just miserable.

Since we WANT artichokes, I seeded a few more and another 4 seedlings emerged, who I planted alongside the other dead-thought-ones.

So we kept caring for the first ones, they eventually started to look better and when we returned from our trip to Utah, one of my first chokes was sporting a flower bud. YES!!!

It is the flower bud that we are eating in artichokes. Once the flower starts blooming (a beautiful blueish thistle), it becomes inedible.

Ready to pick
Of course the question is: When to harvest you artichoke. You want to leave it on the plant to allow it to be just perfectly ripe but you don't want to wait too long for it to start blooming.

So, every day, we have been checking on them and TODAY I thought, it was time for artichoke appetizer!

Cut them about 2-3 inches below the bud.

How do we eat them?

We boil them in a pot with about 3 inches of water for 25-40 minutes. When you can pull one of the middle pedals out, they are done.

While they are boiling, I prepare the dip: Melted butter with lemon juice, pepper and salt.

See the two sideshoot buds. Yum on the way.
Ahhhh! Cannot wait for the next choke to be ripe.

Harvesting time for artichokes is from late July until frost. The centre one is typically the biggest one and the sideshoot buds are called 'baby artichokes'. Pretty misleading, huh? I always thought that they harvest them prematurely but it is simply the next 'generation' of buds.

More on Artichokes   http://extension.usu.edu/files/publications/factsheet/HG-2003-03.pdf


"Nature never says one thing and wisdom another." Decimus Junius Juvenalis

Monday, August 1, 2011

JULY 2011 - HARVEST TALLY and gardening mistakes to avoid in Southern California

Waiting for the tomatoes to ripen
This marks the fifths months of our homesteadying adventure! And yes, I have made lots and lots of mistakes, and hopefully can avoid them for next year.

Here are some of the silly mistakes I made and what I have learnt:
  • Cutting zucchini stems while pruning them - now bacteria can get into the plant. I save it by putting bandaids over.
  • Staking tomatoes too late, causing the fruit to sit on the ground (not good!)
  • Planting zucchini and tomatoes too early in a soil that wasn't warm enough (blossom end rot)
  • Planting a number of zucchini, cukes and squash in each other neighborhood, causing cross-pollination, making the seeds unusable for next year
  • Planting corn too close, stunting its growth
  • Not separating seedlings, stunting their growth
  • Too much water usage
  • Planting cabbages in each others neighborhood, creating an aphid block-party (luckily it attracted these tiny wasps who will take care of this problem)
  • Buying ladybugs to eat the aphids - Now this really is a big problem: When you buy ladybugs, someone has collected them in the wild and when you release them, they will try flying back home. While attempting this, they will die. Also, when you release them, they rarely stay to eat anything. DON'T DO THAT. It's simply not worth it for you and it puts another species in danger. Instead just wait for the native ladybugs in your hood to show up and do the job. Trust me, if you leave the aphids alone, they show up!
  • And last but not least: Allowing the free range birds to forage EVERYWHERE with the result that many tomatoes have been picked in. Not we are fencing in a portion of the backyard to keep our feather-heads out.
  • Planted the cabbages according to the European growing season, which is too hot for them. In Southern California, we need to plant them in fall.
July 2011 Harvest Tally:
1/2 lbs of strawberries (bit by bit or I should say berry by berry from plant to mouth they went - this variety is just too good)
2 lbs of Arugula
1 lbs of salads
64 lbs of zucchinis - everyone got to benefit for this abundance
6 lbs of savoy cabbage
3 lbs of cucumbers
4 lbs basil for pesto
20 lbs of lavender flowers, which I am in the process of turning into essential oils, soaps and sachets.
1/2 lbs of white peaches
1/2 lbs peppermint

41 Duck eggs

A WHOOPING TOTAL OF 101.5 LBS OF PRODUCE!


 THE EVER EXPANDING PROJECT LIST:
  • Planting beds for Blueberries (done)
  • Planting beds for tomatoe seedlings (Black Krim - half of which the wild bunnies ate... argh!)
  • Tear out lawn in front (bit by bit it goes)
  • Move perennial flowers (rose, lavender)
  • Start a kombucha culture (in the making)
  • Start a yoghurt culture 
  • Plant tea plant, hibiscus and jasmin for making tea (planted jasmin and hibiscus; waiting for the tea plants)
  • Planting the pumpkin patch for our pumpkin (again, most got eaten by the bunnies)

"Nature never says one thing and wisdom another." Decimus Junius Juvenalis

Saturday, July 30, 2011

HEALING POWERS OF SUN FLOWERS

For our bees, I planted a sunflower jungle. Bees just loove these large flowers with their abundance of nectar. And we are anticipating a large honey harvest... classic win-win! Once they are bee-eaten, the birds are getting interested in the sunflower seeds.

Now I have learned that sunflowers can do even more than being pretty and nutritious to a variety of beeings:

Apparently sunflowers have the ability to draw cesium and strontium  - both radioactive chemicals - out of the soil, which is why activists have started a huge project to send sunflower seeds to Japan.

http://www.care2.com/causes/sunflowers-may-heal-fukushimas-radioactive-soil.html

So, what do you think am I going to do with a huge portion of my saved seeds? Exactly: Send them oversees.


"Nature never says one thing and wisdom another." Decimus Junius Juvenalis

Monday, July 25, 2011

HIPPOCRATES VS. MEDICINE IN THE USA

Hippocrates, the ‘father of western medicine’ was a Greek physician who lived from approximately 460 B.C. until around 370 B.C. He is credited as being the first physician who believed that diseases were not caused by superstition or gods, but rather that diseases had natural causes. 


Today's doctors all take the Hippocratic Oath, but are they actually following his teachings?


Here are just a few of his teachings and or demands upon physicians:


1. Do no harm!


“Whenever a doctor cannot do good, he must be kept from doing harm.”


“As to diseases, make a habit of two things – to help, or at least, to do no harm.”


In April, the Los Angeles Times reported that, "One recent study published in the journal Health Affairs estimated that one in three patients admitted to a hospital experiences what is known as an "adverse event" such as being given the wrong medication, acquiring an infection or receiving the wrong surgical procedure."


VERDICT: FAILED!


2. Nutrition and Exercise

“If we could give every individual the right amount of nourishment and exercise, not too little and not too much, we would have found the safest way to health.”


“Let your food be your medicine, and your medicine be your food.”

“Walking is man’s best medicine.”


In a country, where ads for prescription medication are on TV, it comes at no surprise that, "The number of hospitalisations due to poisoning by prescription drugs have increased from approximately 43,000 to about 71,000 in the country between 1999 and 2006, said the report published today in the American Journal of Preventive Medicine." (The Hindu - April 6, 2010)

While the NY Times reports in May, "The rate of prescription pain medication misuse by New York City residents who are 12 or older has increased by 40 percent from 2002 to 2009, according to a report released Friday by the city’s Health Department. "

When it comes to prescribing good nourishment and work-out, it is even more worry-some:

While health insurance in most European countries subsidize gym memberships, this simple preventive measure is completely unheard of in the United States of America. 

And healthy food is really hard to come by these days. With Monsanto and Co. being treated as a person and therefore granting them constitutional rights including the one for free speech, allows for these said companies to claim basically anything that they want and makes it legal to not list all the ingredients contained in any cosmetic or food or any other consumer product. Personally, I find this almost criminal and I encourage EVERYONE to sign the petition to revoke these constitutional rights for corporations at www.movetoamend.org 

Meanwhile, genetically tempered soy and corn is in a large variety of foods. No wonder, the cancer and allergy rates are much higher in the US than anywhere else in the world, where these kind of tempered foods are banned. 

VERDICT: FAILED!


3. The body's healing powers

“To do nothing is sometimes a good remedy.”

Have you ever left your doctor's office without a prescription medication or an address for either a lab or a specialist? Today in the USA, a medical practise is a BUSINESS: the more tests they run on you, the more $$$ they make. 

“Natural forces within us are the true healers of disease.”

Osteopaths and other alternative physicians know this but your average MD believes in meds and cold steel alone. Again, more procedures, more money in the bank. 

VERDICT: FAILED!


4. Comforting patients - the human connection

“Cure sometimes, treat often, comfort always.”
How long is your average face time with your physician? 10 Minutes? You are lucky! The New York Times reported in March 2006, that the average time with a physician is exactly seven minutes. 


How can someone comfort you, when they do not even have the enough time to listen and find out what is going on with you?

VERDICT: FAILED!


5. A thought is a thing!

“A wise man should consider that health is the greatest of human blessings, and learn how by his own thought to derive benefit from his illnesses.”

Many alternative healers will agree that a disease is teaching the patient something and obviously our attitude plays a large factor in healing, which many cancer patients will testify. And yet, we still spend more more money researching the latest drug or fancy expensive diagnostic tool as opposed to understanding the amazing healing powers of our very own minds. 

VERDICT: FAILED!


6. Astrology as a diagnostic tool


"A physician without any knowledge of astrology has no right to call himself a physician."

With the aid of astrology, Hippocrates was not only better equipped to diagnose the ailment but he could also better predict the process of the disease. It is often referenced that there were certain days when 'crisis' (a worsening of the condition or bettering of the patient) occurred as part of the healing process. These days were astrologically calculated. 


“It is more important to know what sort of person has a disease than to know what sort of disease a person has.”

Another hint to astrological patterns as a diagnostic tool. 

I, personally, do not know of ANY physician who uses astrology as a diagnostics tool. 

VERDICT: FAILED!


CONCLUSION:
To sum it up, I would have to say that it is pretty lame that physicians take an oath dedicated to a healer and yet they do not follow any one of his teachings. Until they start following his teachings, I recommend they stop the charade of the oath!


"Nature never says one thing and wisdom another." Decimus Junius Juvenalis

Sunday, July 10, 2011

MY OATMEAL COOKIES RECIPE - with the get some protein into the kids trick

We are spending a weekend in beautiful Park City, UT.

The 'retired' marketing exec in me thinks, they should change their marketing campaign to "Love at an Elevation". Their current claim "Life elevated" isn't really doing it for me. 

After lunching at the Park Silly market, a wonderful farmers and crafters market every Sunday from 10am til (I believe) 5pm and we were back home in time for the daily brief storms with thunder and lightening, when I asked the gang whether they felt like cookies. OH YES! In retrospect, DUH - why did I ask?

Since I am often worrying that Aurelia gets enough protein, I add whey protein in a bunch of baked items, hehe.

At this point, I probably should talk about the soy problem and why anything including soy (and also anything including high fructore corn syrup) is banned in our households. You may want to check the ingredient lists of snack foods, especially those sold for kids and you will be amazed how many have these two black lister ingredients in them.

Here is why soy is bad for you: To get quality soy is almost impossible because along with corn it must be the most tempered with crop. In addition to its wide range genetical modification, soy may cause cancer (or maybe because of it, who is to say?!). And if that's not enough, I am highly allergic to soy. My body knows best, eh?!

Anywho, here is the recipe:

Ingredients

  • 1 cup butter
  • 2 cups brown sugar
  • 2 eggs well beaten
  • 1 1/2 cup of milk
  • 1 1/2 cup flour
  • 1 1/2 tsp baking powder
  • 1 Serving of chocolate whey protein
  • 3 cups oats (do not use instant)
  • 1 cup chopped walnuts
  • 1 cup chocolate morsels

THE PREP

1. Cream shortening and sugars, add eggs and milk and beat well.

2. Sift flour, salt, baking powder. Add to first mixture and mix well; add all other dry ingredients.

3. Add morsels and nuts. Add oats last.

4. Spoon out by rounded tablespoonfuls on to greased cookie sheets. Bake at 350°F. Bake for 10 minutes.

5. Remove to wire rack. Cool completely.

6. Start munching.

Makes about 2 dozen cookies.


"Nature never says one thing and wisdom another." Decimus Junius Juvenalis